 Today I am going to talk to you about how we chose the right hardware for our kitchen. The smallest change can make a world of difference. By adding knobs or pulls to your cabinets you can bring a whole new style to your kitchen. We partnered up with Kreg on this project, I am excited to share with you the tool that helped make this project efficient. When we purchased our home and choose our cabinetry we decided not to go with the hardware that was offered by the builder. It was very standard and we didn't want to pay the extra money for something that we were not too fond of. So fast forward to 4 years later, and we are finally putting the finishing touches on our kitchen! We have lots of mini kitchen projects ahead of us, but one step at a time!
We looked around and chose a handful of kitchen hardware. We picked up things that we knew we might not like, but we insisted on trying it. So we kind of went buck wild and purchased over 75 different pieces. Check out some of our options:
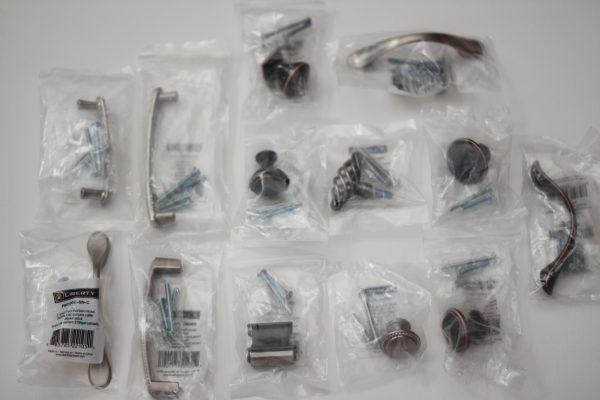
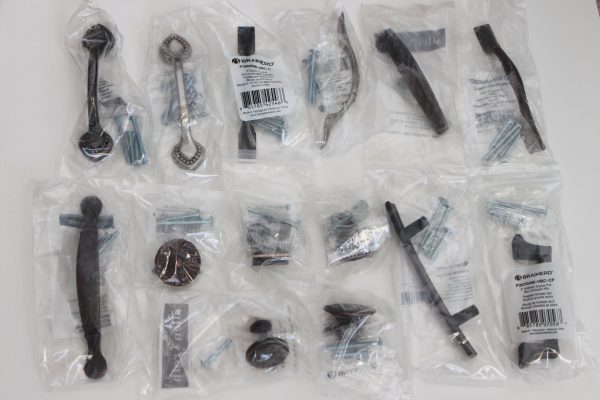 It was a little overwhelming. We had to be pretty careful about taking each piece out of its packaging and modeling on our cabinets and remembering what packaging it came out of. To give you a better idea of what our kitchen palette looks like, this should help you out.
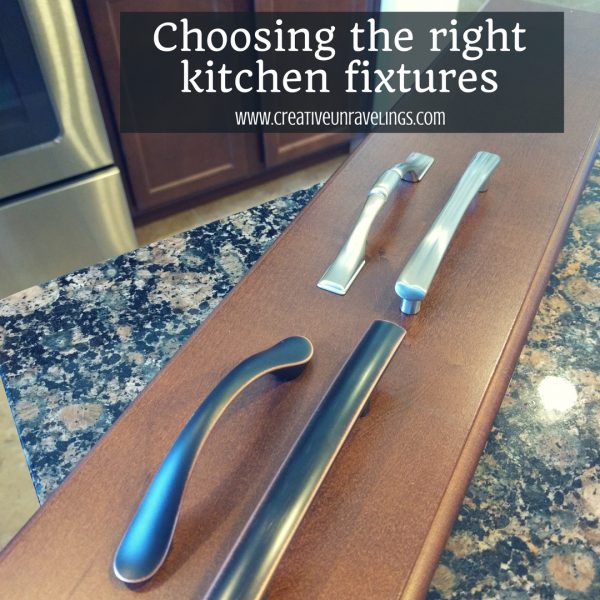 At first, we could not decide on what color suited the cabinets best. My husband thought the "nickel" looked good and I thought the "bronze" matched our cabinets best. After asking around, most people agreed that bronze suited our cabinets best. So, into the return bag went all the "nickel" fixtures. Later, my husband agreed that bronze was the way to go. We both thought the nickel fixtures would stand out too much on our dark cabinets. Now it was trying to decide on "bronze" knobs or handles...
 Below are just some tips and opinions of our own that we noticed when we were browsing the custom cabinetry at our local home improvement stores.
- It's a good idea to keep the pulls and knobs in your kitchen uniform in size.
- Drawers wider than 18" should use either two knobs or 1 pull. We actually prefer the 2 pulls per drawer. We think it adds a little more.
- It's also a good idea to keep the color of the pulls and knobs the same through out your kitchen.
- Never judge a piece of hardware in the bag. Purchase it and try it out! You might be surprised!
While we were testing these fixtures out we thought it would be best to test them out in our bathrooms. They are all the same cabinetry and right now have no fixtures. Some of the fixtures we purchased were a little too ornate for the kitchen, but suited the bathrooms really well. We killed two birds with one stone!
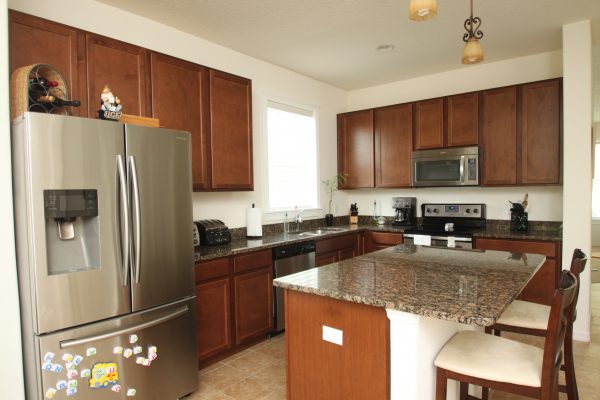
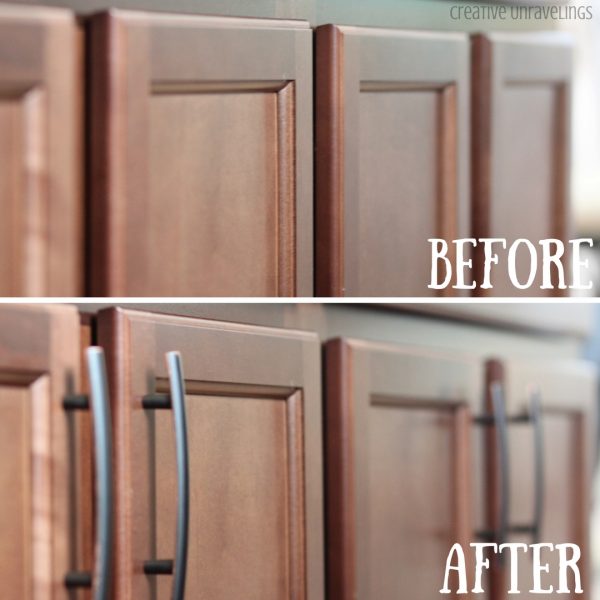
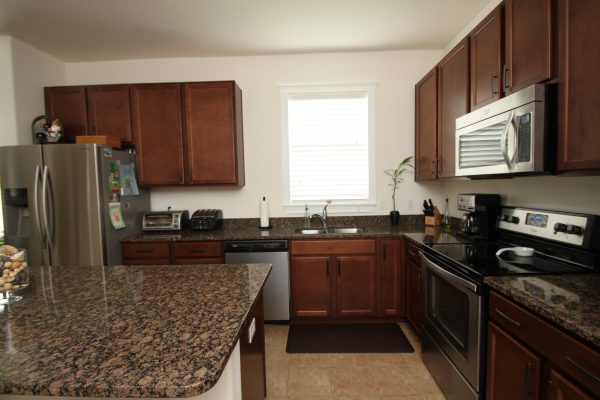
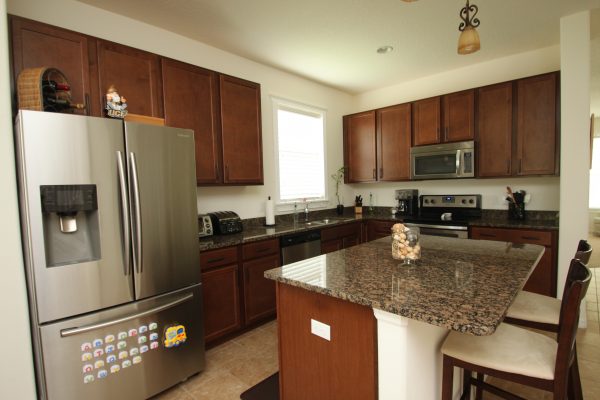
Oh, it's the year of the kitchen! We want to tackle so many little things in this room. We thought it would be best to start with the hardware. Here is our kitchen before the hardware.
 It took us months to decide on what hardware to get. When I say we literally purchased about 75 hardware pieces, I am not exaggerating. With finding the right hardware you have to be sure that you are completely in love with it. After all you will not only be looking at it on a daily basis but using it too. Some pieces of hardware we liked, but we didn't like the feel of it. We also thought that some of the hardware designs would show nicks and scratches over time. All these concerns factor into why it took us a while to find the perfect piece of hardware.
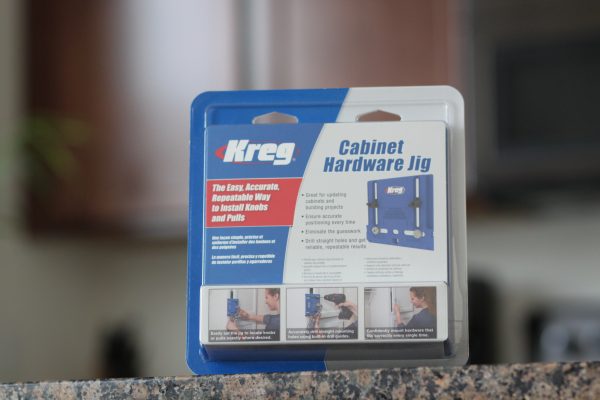
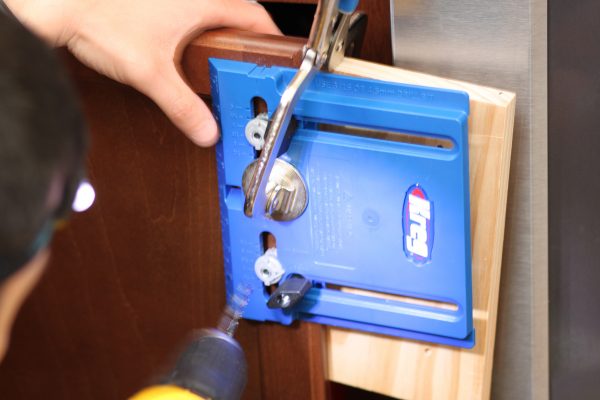
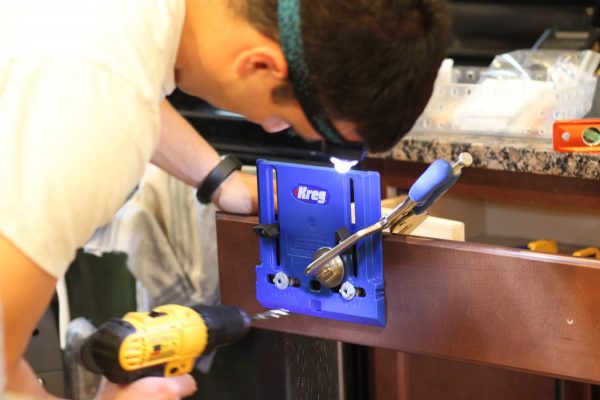
We partnered up with Kreg on this project. They sent us their Cabinet Hardware Jig. Let's talk about how to use the jig...
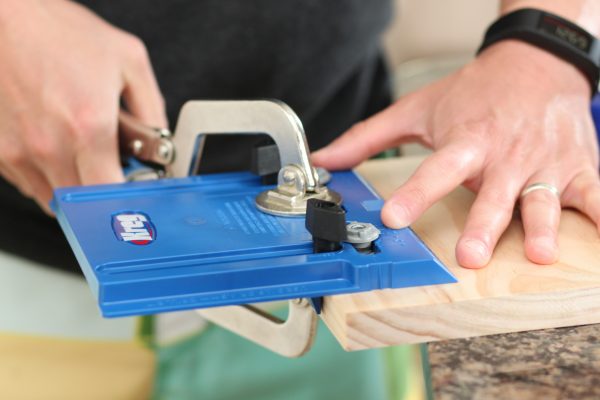
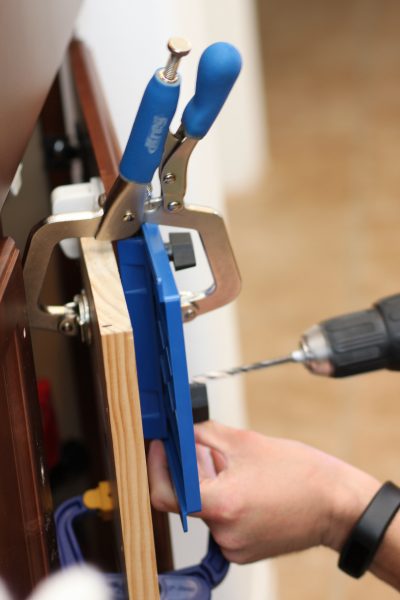
 First, it is a really good idea to practice on a piece of wood before trying it on your cabinetry.
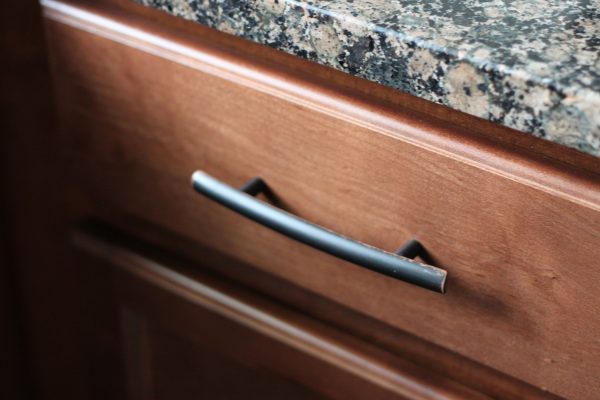
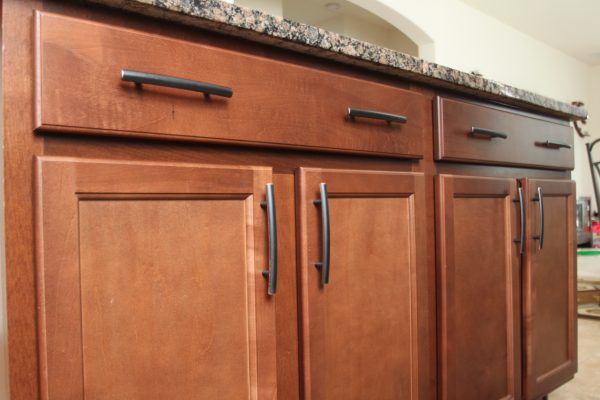
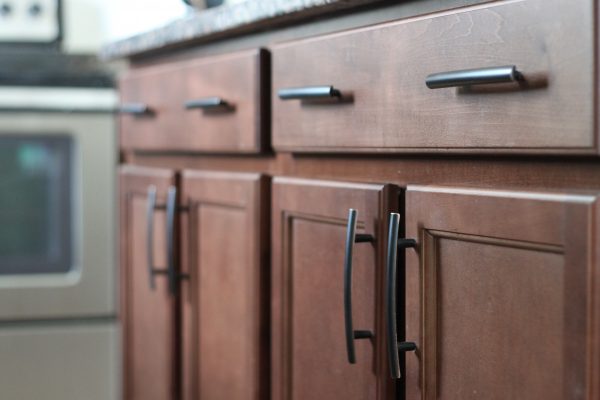
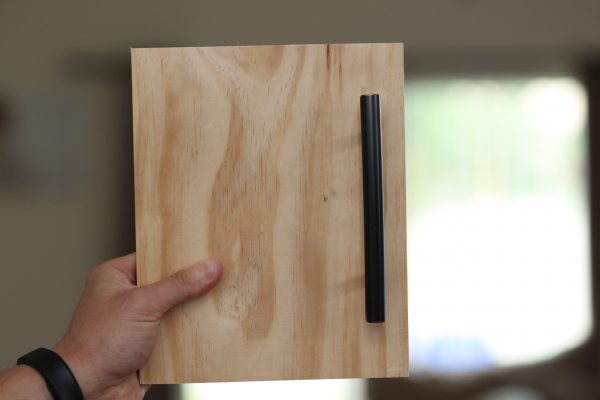 So this is it! This is the piece of hardware that we chose! Its a dark metal with a hint of brassy highlight on the edges which goes perfectly with our cabinets.
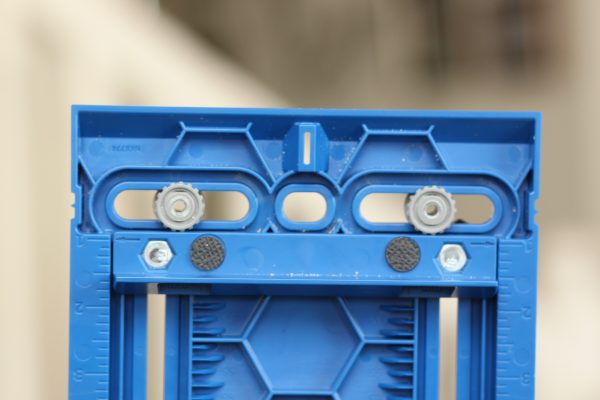
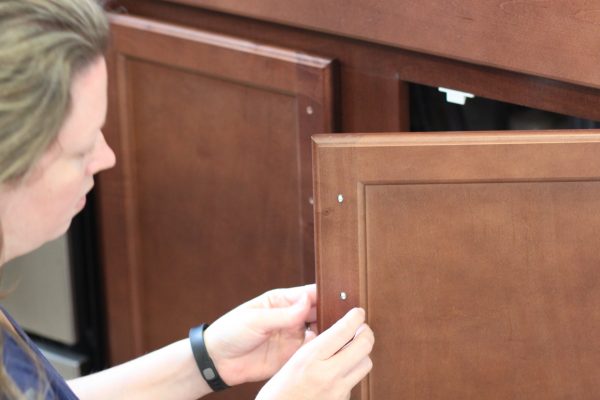
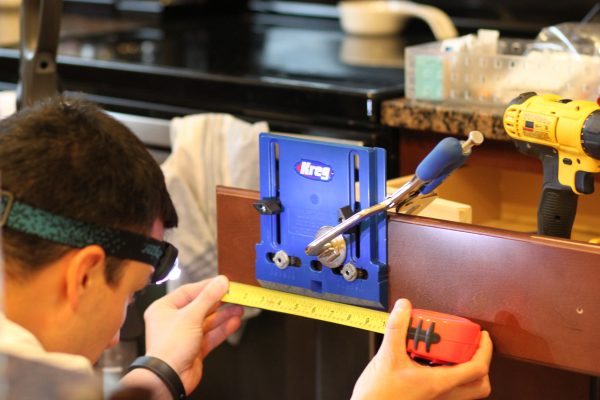
We all learn from mistakes. We made a little mistake with not lining up the arrows exactly with the line on the jig. Lining up the gauge on the back of the jig needs to be precise. Check, double check, and check again before drilling, that they 2 arrows are even on both sides. Any discrepancy will result in crooked hardware. We had it ever so slightly misaligned at first, and the first handle installed is just a little crooked. So its a good idea to make sure that your arrows are completely aligned on the (number) line that it needs to be. We started with our cabinets over our fridge (since they would be less noticeable if they were a tab bit off. So being that we needed our number to be on the line for "1" this hardware measurement, this is what our Kregjig tool should look like:
 Next, it's a really good idea to use a piece of wood on the other side of your cabinet door. So you will have the cabinet in what you call a sandwich (Kregjig/cabinet/wood.) This will help to prevent tear out on the inside of the cabinet.
The cabinet hardware we purchased is 3 3/4 inches. When first examining the jig, my husband noticed a notch for 3 1/2 and 4 inches. Of course. So, he did his best to line up the drill guides dead center between these 2 notches. He then tested with a handle against the jig to make sure they were perfectly aligned. He was confident they were. And, then, he saw that there's a 96mm notch, which is roughly 3 3/4 inches. 96mm is the actual measurement of our hardware, but both standard and metric measurements are on the package. He overlooked the metric measurement at first, because we are American.

 For the cabinet doors, he used a 1 inch offset for the hardware from the outside edge of the door. If we had wanted it centered on the border of the door, we would have had to go smaller than 1 inch, which the jig does not explicitly allow. He didn't want to have to eyeball it. And, slightly off center on the cabinet door border actually looks good.
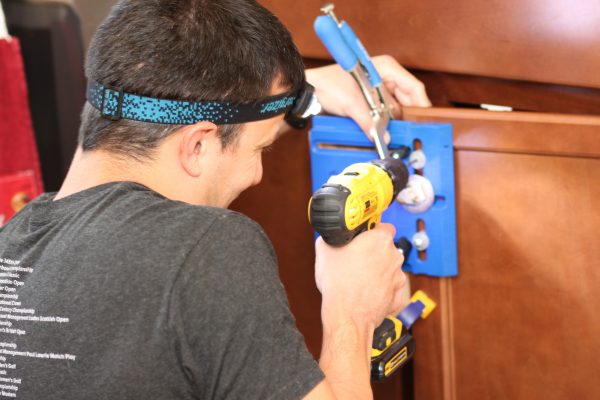 My hubby and I make a great team. I love to get in on the power tool action every so often, but I left this task up to him. The more cabinets he did, the quicker it went. I worked on screwing the handles on the cabinetry.
 I am just so in love with the hardware we chose! This is a good picture where it captures those brassy highlights.
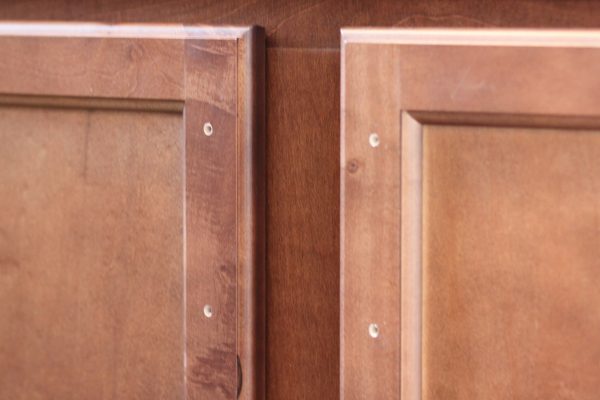
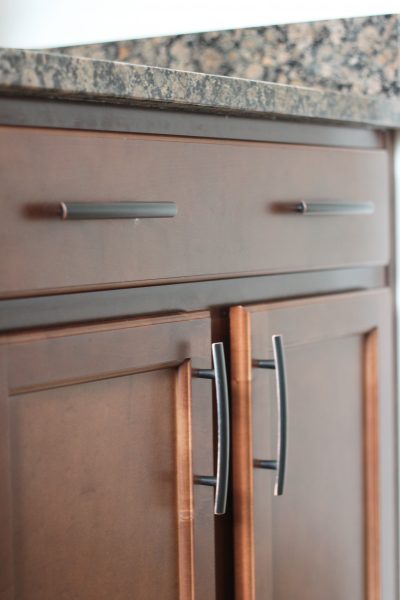
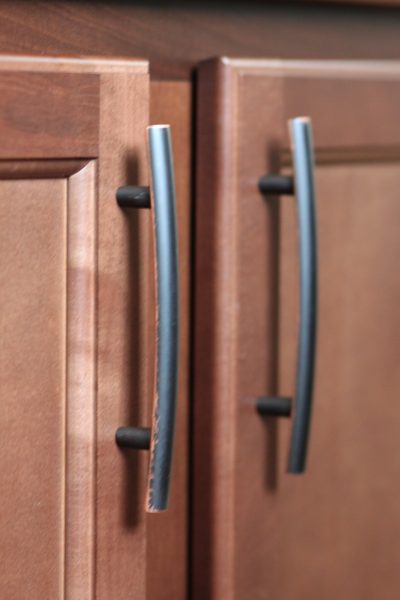 Here are some of the handles installed
 The drawers are a little trickier. He had to measure center from top to bottom, and mark it on the cabinet. Then, he had to measure center left to right and mark that as well. He set the jig edge guide to 1/2 the top to bottom measurement, then lined up the center guide with the center mark from left to right.
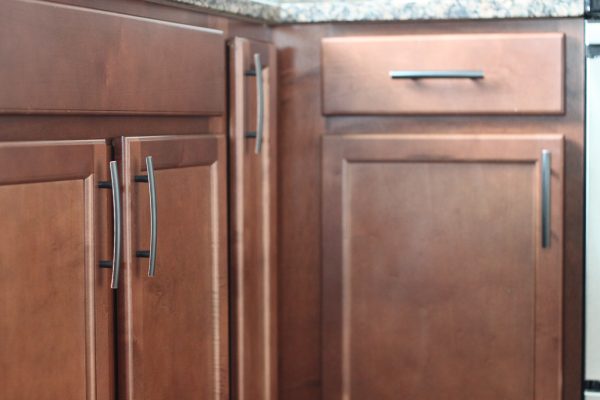
 For the wider drawers that required 2 pulls, he measured the center of the drawer from left to right, then split the drawer in 2 halves, then measured another center line for each half, from left to right, and lined up the jig as previously described. But, eyeballing it, this just didn't look quite right. So, we did a little research on hardware placement in a situation like this. Without finding any concrete ratio or formula, we simply decided to just see what looks best. What we finally decided on, was to center each handle with the cabinet door below it. Simply splitting the drawer in half, then centering the handles on each half made them look too far in, which makes sense because the doors below don't span the full width of the drawer. They're slightly shorter for the spacer in between.
Here is an up close view of one of our drawers with a single piece of hardware centered.
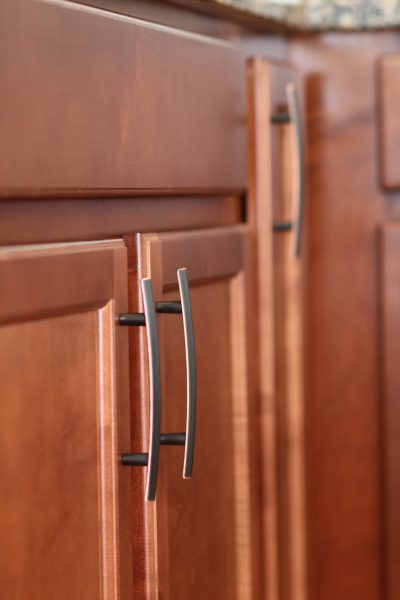
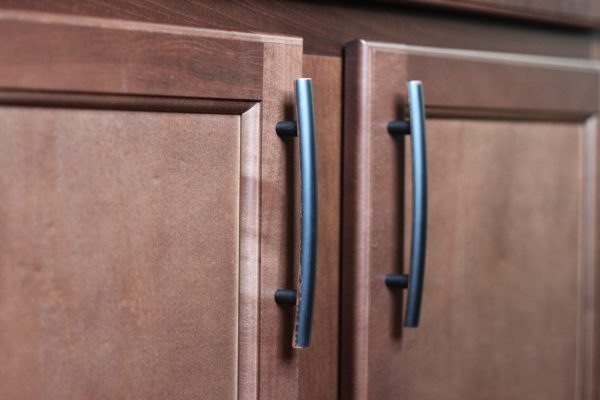
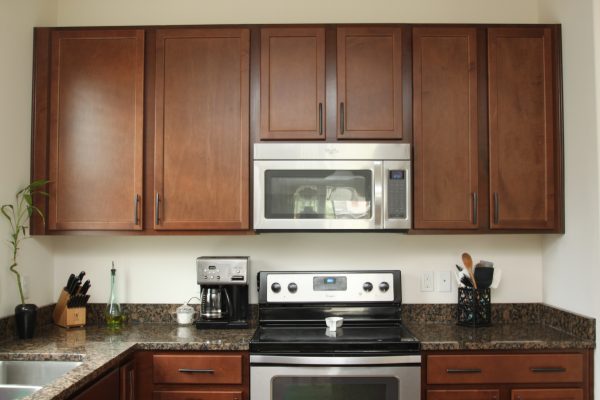
 This picture gives you a better view of how the handles look on the cabinets.
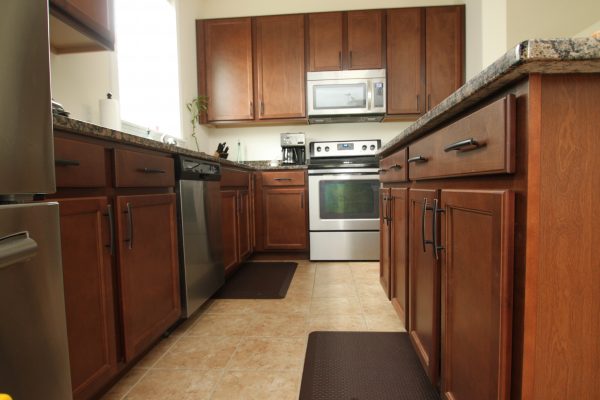
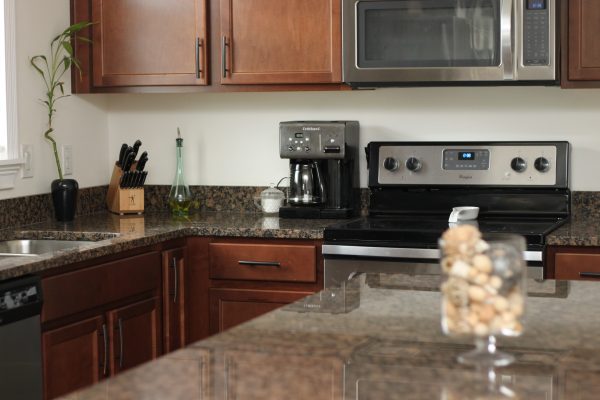
 Looking at our kitchen as a whole, I know its hard to see the hardware, so here are some close up detailed pictures of the kitchen hardware.
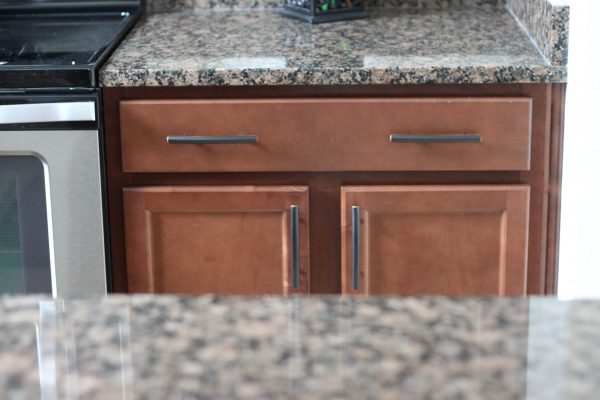
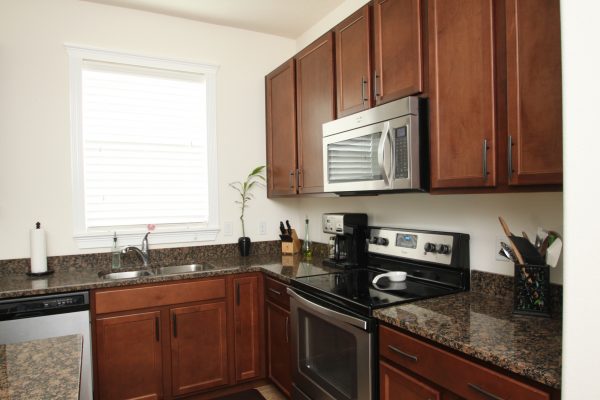
 Here is our kitchen as a whole, the hardware adds so much to the overall design of the cabinets.
 We were really happy with the Kreg Cabinet hardware jig. But, there are a couple things we think could be improved. On the back of the jig, it would be nice to see more increment markings, to make it easier to line up the 2 sides. It would also be nice if there was some easier way to center the jig on the drawers. Maybe a rail add on to make it easier to center it left to right. We could also have used a deeper clamp for the drawers, because we had to clamp the jig, drawer facade, drawer backing, and a scrap piece of wood, but that's not the jig's fault.
Note to self: I ripped my shorts 3 times in one day just walking around the kitchen. I now have to learn how to properly walk with handles on our kitchen doors. So beware of this little annoyance when picking out your hardware!

We are super pleased at how they came out! Thank you Kregjig for another amazing product! This project was headache free and took us only a few hours to complete!
Disclaimer: We received the Cabinet Hardware Jig from Kregjig for free. We love their products! Our opinions are our own.
Comments2
Wow, we could have written this article. We used almost identical handles (ours were straight and not curved), had the same issue with the jig with the deeper drawers, AND keep snagging my clothes on the handles!
Mike, that is so funny! The straight handles were on top of our list as well! You spend so much time searching for the "perfect fixture" and do not even think of things like it snagging your clothes! I just have to learn how to maneuver through the kitchen better! Thank you for stopping by and commenting!